The Unforgiving Shrub: Best Practices for Trimming Arborvitae Trees
Essential Rules and Physiology for Trimming Arborvitae Trees
To trim arborvitae trees safely, prune only the outer 2 to 3 inches of green foliage in late winter or early spring, taper the sides so the base stays wider than the top, and never cut into the brown interior dead zone. These simple limits protect the tree's living canopy and prevent permanent bare spots. Understanding the basic anatomy of conifers makes trimming arborvitae trees straightforward and prevents permanent mistakes. Unlike deciduous trees and broadleaf shrubs, evergreens like Thuja occidentalis (American arborvitae) and Thuja plicata (Western redcedar) do not store dormant buds in their interior wood. All photosynthetic energy is produced and maintained along the outer shell of green needles.
When you shape an evergreen screen, you are working with a thin shell of living foliage. Gaining insight into botanical research on woody plant physiology helps explain why conifers react so poorly to aggressive hedging. You can explore standard principles for the proper pruning of trees to see how evergreen branch structures differ fundamentally from broadleaf species.
The Interior Dead Zone and Lack of Latent Buds
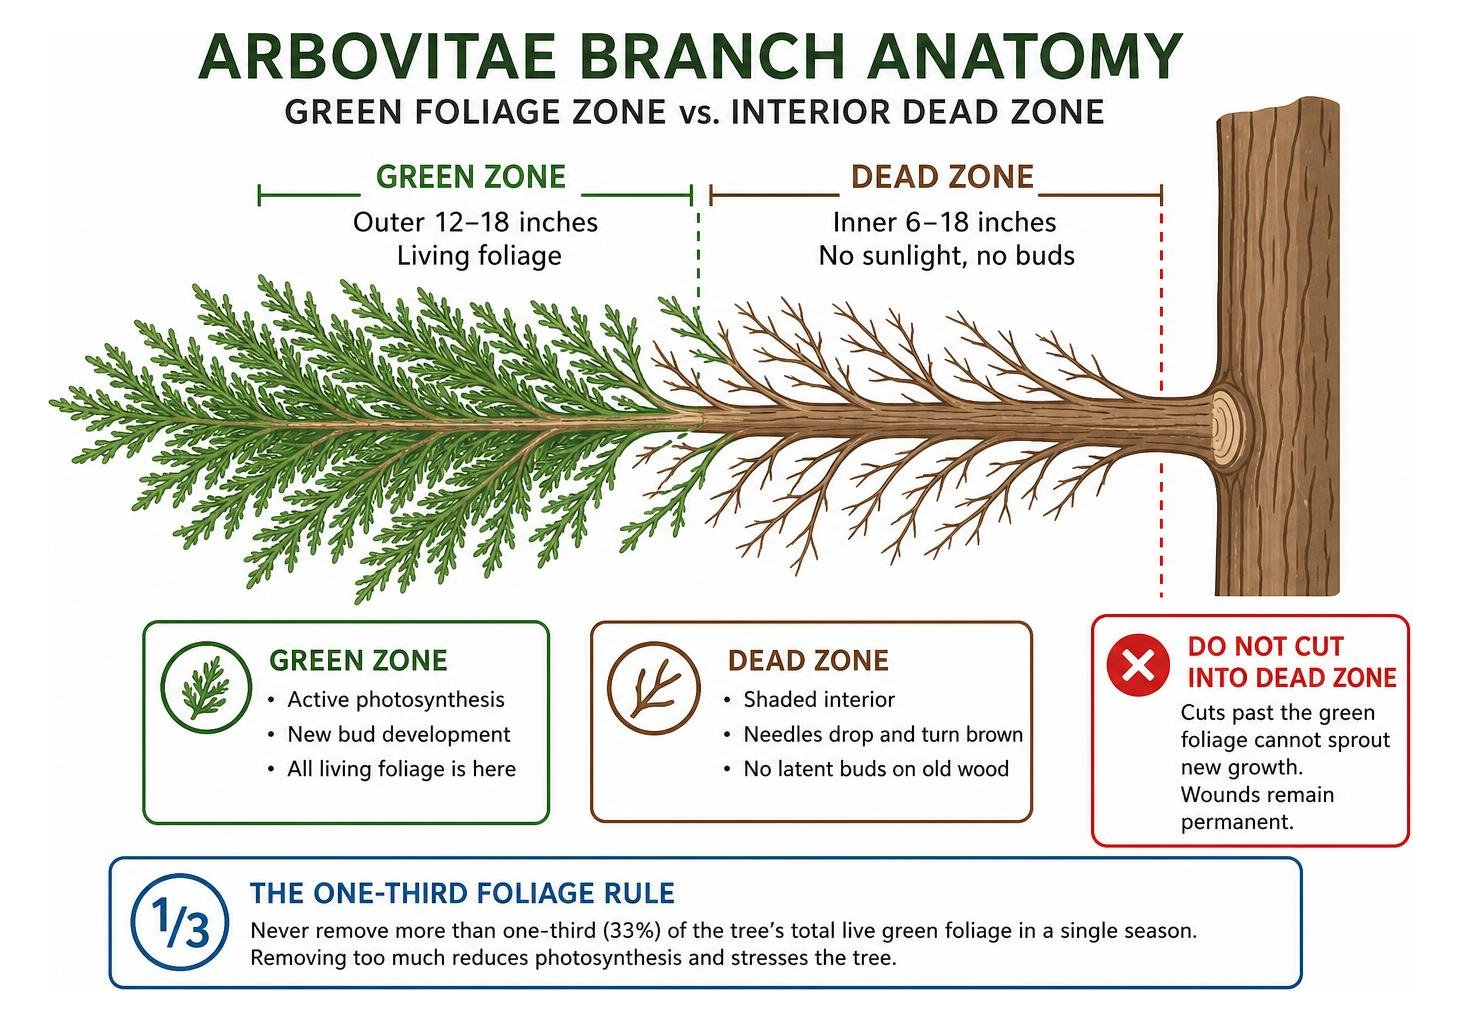
Every mature arborvitae has two distinct zones:
The Green Zone: The outer 12 to 18 inches of leafy branch tips where all active photosynthesis and new bud development happen.
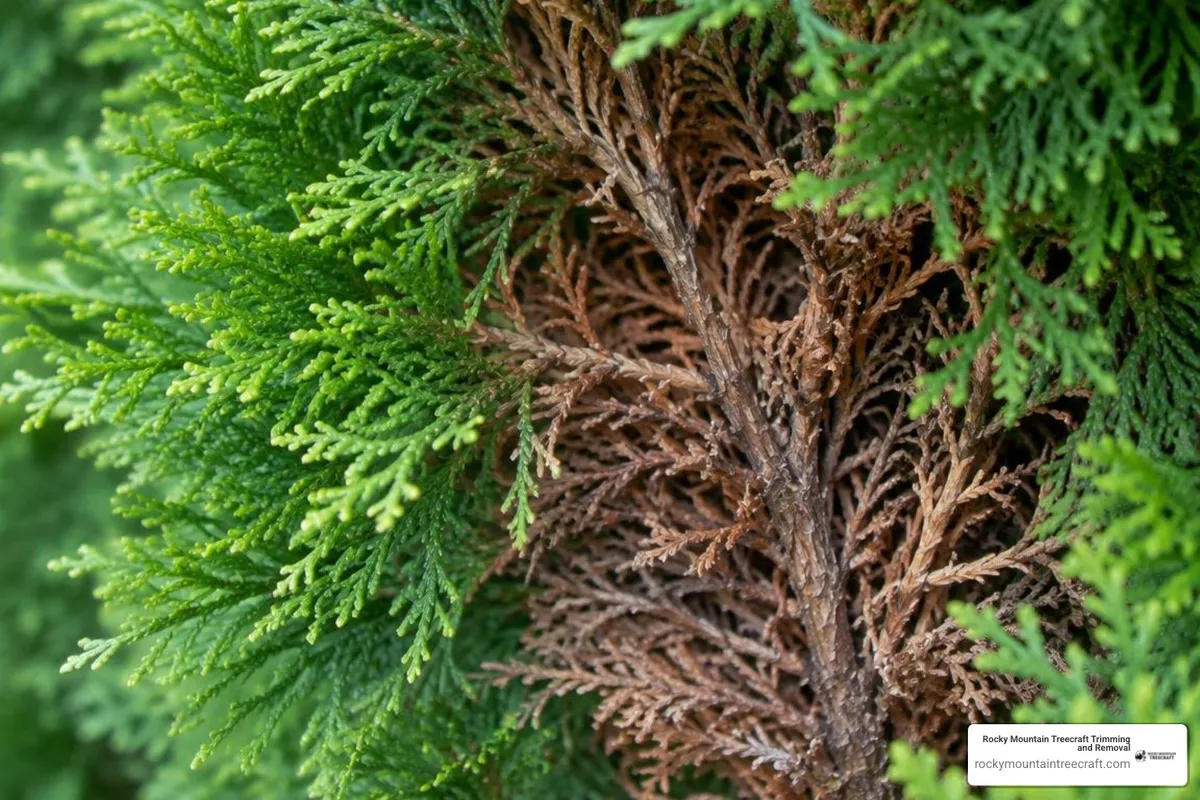
The Dead Zone: The inner canopy, extending 6 to 18 inches from the central trunk, where sunlight cannot reach.
Because arborvitae lack latent buds on old wood, interior branches drop their needles and turn completely brown once shaded out. If you make a cut past the green foliage into this brown interior, the tree cannot push out new sprouts to hide the wound. That spot remains an exposed, bare hole permanently. Think of every cut into the brown wood as a permanent scar.
The One-Third Foliage Rule
Removing too much green foliage at once robs the tree of its ability to produce energy through photosynthesis. This puts severe stress on the root system, leaving the plant vulnerable to drought, heat, and fungal pathogens.
Never remove more than one-third (33%) of the tree's total live green foliage in a single season.
For routine annual shaping, removing the outer 2 to 3 inches of leafy growth is usually plenty to encourage lateral branching.
Lightly nipping off just half an inch of new growth at branch tips can increase lateral branching density by up to 50%, producing a lush, full privacy screen without shocking the tree.
Optimal Timing and Tool Selection for Evergreen Health
Timing your cuts around local weather patterns and plant growth cycles protects tender foliage from environmental stress. In high-altitude areas like Wasatch County, harsh winter winds, heavy snow loads, and rapid freeze-thaw cycles make proper pruning schedules especially important.
Arborvitae Cultivar | Annual Growth Rate | Recommended Trimming Frequency | Best Trimming Window |
|---|---|---|---|
Emerald Green (Thuja occidentalis) | 6–9 inches | Once annually | Late winter to early spring |
Green Giant (Thuja standishii x plicata) | 3–5 feet | 1–3 times per season | Early spring, with light touch-ups in early summer |
Techny / Mission | 12–18 inches | Once annually | Late spring after first growth flush |
North Pole | 12–24 inches | Once annually | Early spring before bud break |
Best Seasonal Timing for Trimming Arborvitae Trees
The best window for major shaping is late winter to early spring, just before the trees break dormancy. During this window, the tree suffers minimal sap loss, and the strong surge of spring growth quickly covers any fresh cut surfaces.
A secondary window occurs in late spring to early summer (typically late May through June), right after the first seasonal flush has hardened off. You can perform light touch-ups during this time to tidy up runaway shoots.
Avoid heavy trimming in late summer or autumn. Cuts made late in the year trigger tender new shoots that lack the time to harden off before freezing temperatures arrive. This increases the risk of winter desiccation and severe frost burn. Integrating your hedge maintenance with broader seasonal tree and shrub care keeps your mountain landscape resilient through every season.
Essential Pruning Tools and Sanitization
Using the right tools ensures crisp cuts that heal quickly without tearing delicate bark fibers:
Bypass Pruning Shears: Ideal for detailed hand cuts on individual stems up to 3/4 inch thick. Always choose bypass blades over anvil styles to avoid crushing live plant tissue.
Bypass Loppers: Designed for clean cuts on thicker interior branches between 1 and 2 inches in diameter.
Manual Hedge Shears: Best for gentle outer shaping and maintaining crisp hedge lines while preserving a natural appearance.
Power Hedge Trimmers: Great for long, formal hedges, provided the blades are razor-sharp. Dull blades shatter needle tips, causing widespread tip browning and inviting pest problems.
Curved-Blade Pruning Saw: Handy for removing thick dead structural limbs near the center of the tree.
Always sanitize your cutting blades between individual trees using a 70% isopropyl alcohol solution or a mild disinfectant spray. This simple step prevents the spread of fungal spores and bacterial blights across your hedge line.
Shaping Techniques: Tapering, Height Control, and Lower Canopy Care
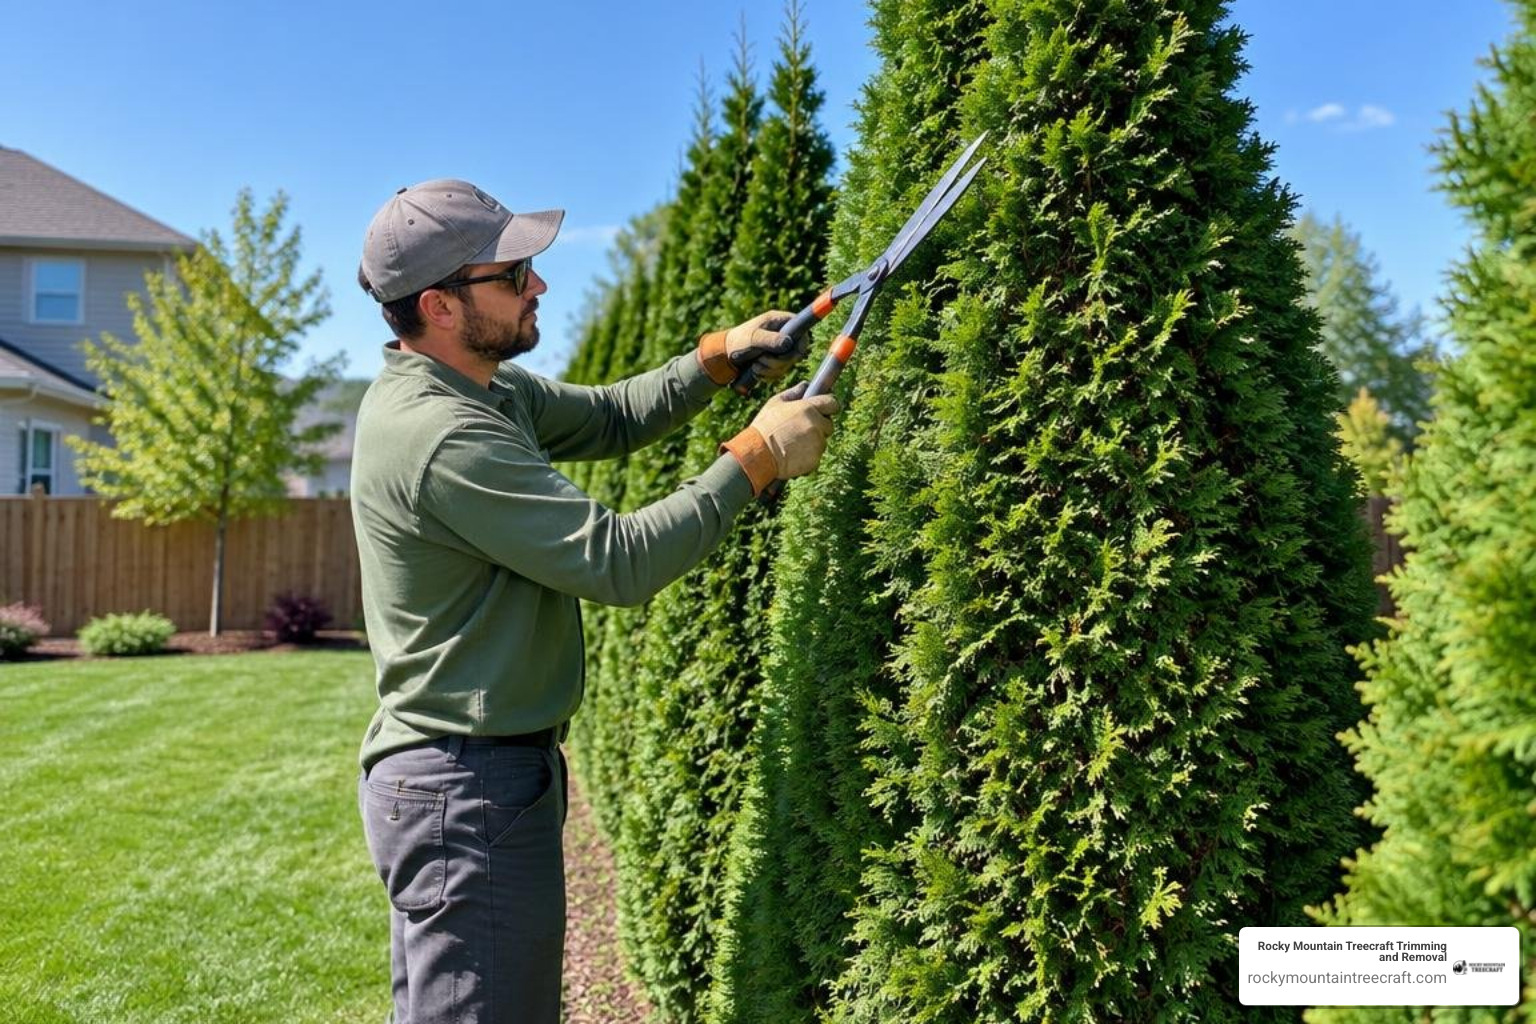
When trimming arborvitae hedges, geometry plays a major role in plant health. The natural tendency for many homeowners is to sheer hedges into straight vertical walls, but this is one of the most common causes of lower branch decline. Reviewing basic rules for tree shrub pruning and proven guidelines for trimming emerald cedars will help you maintain great density across your entire screen.
Step-by-Step Technique for Trimming Arborvitae Trees and Hedges
To keep your trees lush from top to bottom, always follow the Keystone Taper Rule: the base of the tree must remain wider than the top.
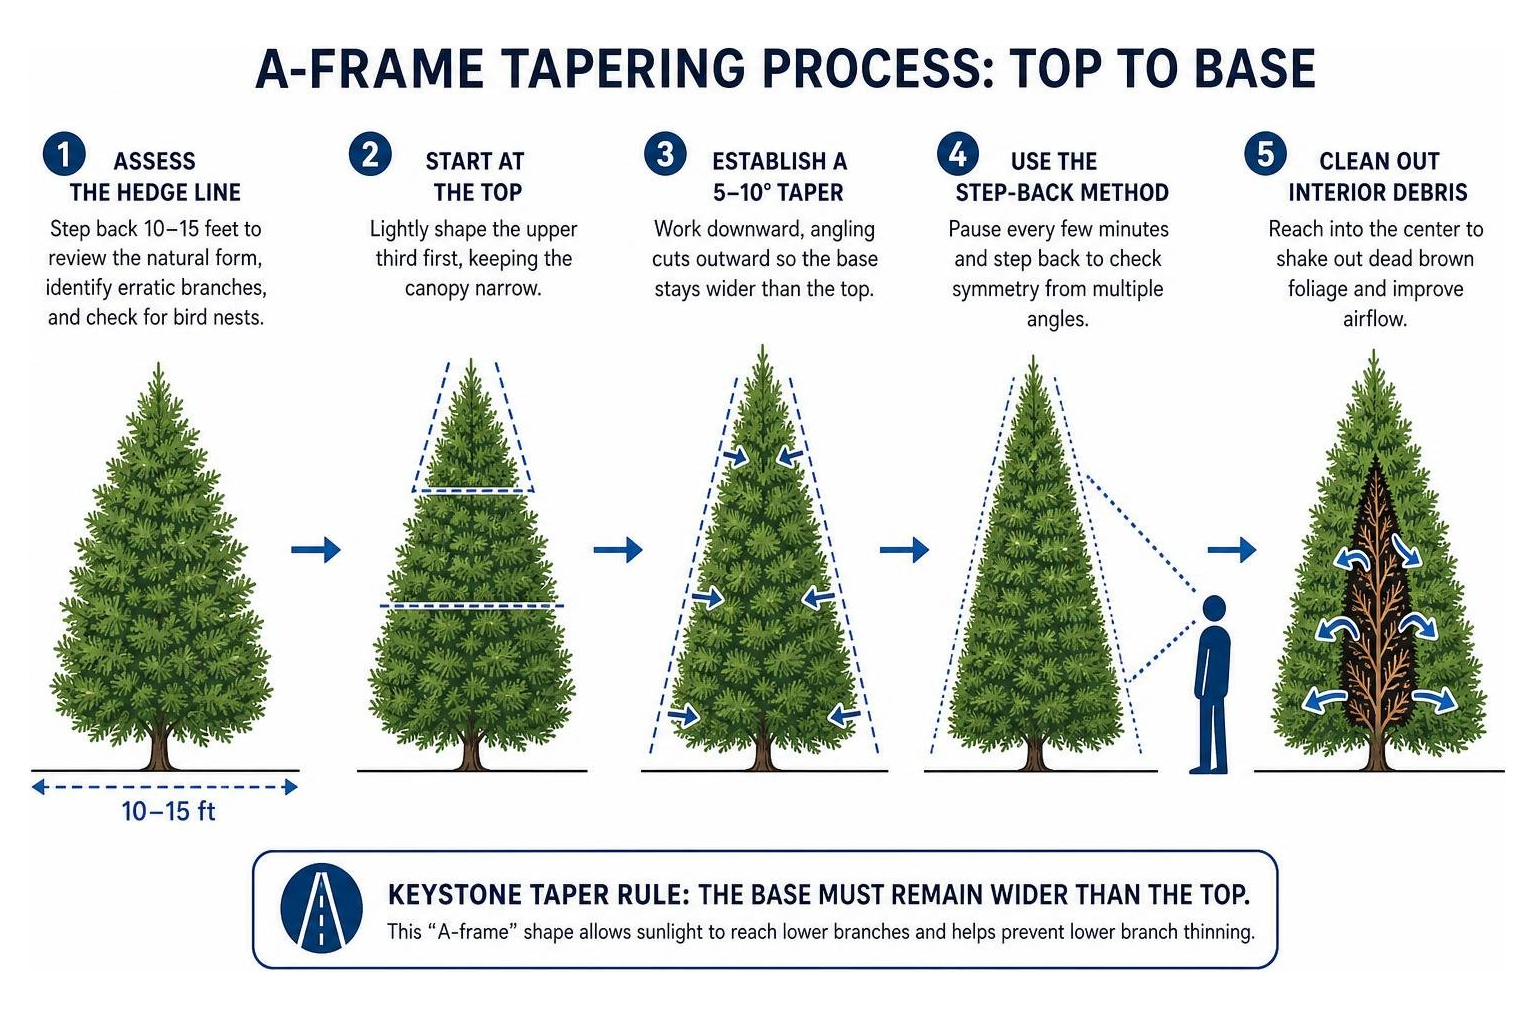
Assess the Hedge Line: Step back 10 to 15 feet to look over the natural form, identify erratic branches, and check for bird nests before starting.
Start at the Top: Lightly shape the upper third of the tree first, keeping the canopy narrow. A conical or rounded peak naturally sheds heavy mountain snow and prevents split leaders.
Establish a 5 to 10 Degree Taper: Work your way downward, angling your cuts outward so the base stays broader than the peak. This intentional "A-frame" profile lets sunlight hit the lower branches, preventing them from thinning out and turning bare.
Use the Step-Back Method: Pause every few minutes and take several steps back to inspect your symmetry from multiple angles. This simple habit keeps you from cutting too deep into one spot.
Clean Out Interior Debris: Reach into the center to gently shake loose trapped dead brown foliage. Clearing out this dropped foliage opens up airflow and can lower fungal disease risks by up to 30%.
Managing Overgrown Trees and Multi-Year Height Reduction
If an arborvitae has grown taller than you would like, you must reduce its height gradually over several seasons. Drastic topping destroys the tree's natural form and often exposes the inner dead zone.
Reduce no more than 1 to 2 feet of height per season.
Always cut the central leader back to a vigorous, upward-facing lateral green branch rather than shearing it off flat.
Managing central leaders thoughtfully can improve overall foliage density by up to 30% over two growing seasons by encouraging lateral branch development.
For multi-stemmed cultivars, tie split stems together with flexible arborists' webbing to provide support during heavy snowstorms.
Elevating Lower Branches and Base Clearance
While arborvitae look best with foliage running all the way to the ground, elevating the bottom edge is sometimes necessary for mower clearance or plant health.
Prune lower branches only 6 to 12 inches above the soil line.
Ensure every shortened branch retains plenty of green tips on its outer end.
Raising the lower canopy keeps foliage off damp soil, which helps deter spider mites and reduces soil-borne fungal spores.
Check Wasatch County regional planting guidelines to ensure your hedge clearances fit local easement and fire defensible space recommendations.
Post-Pruning Aftercare and When to Replace Damaged Trees
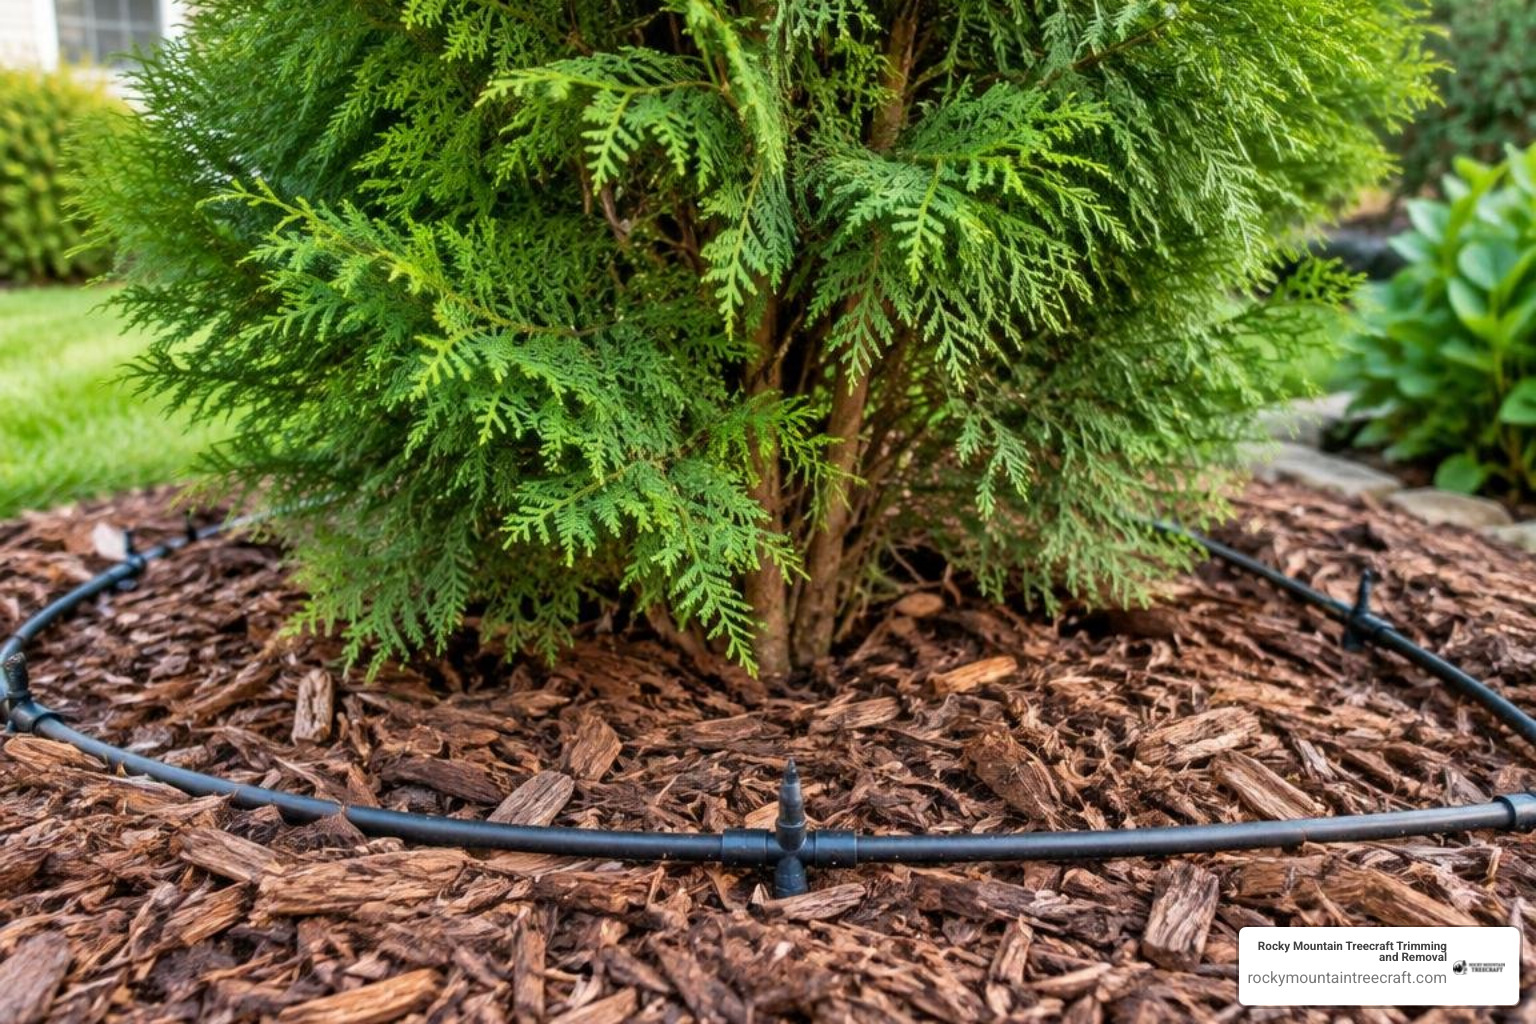
Pruning causes temporary moisture loss and triggers new growth, making post-trimming care essential for recovery.
Hydration, Fertilization, and Winter Protection
Deep Root Watering: Give your hedge a deep soaking immediately after trimming. Evergreens need ample soil moisture to repair cut branch tips and support new foliage.
Organic Mulch: Spread a 2 to 3-inch layer of organic wood mulch around the drip line, keeping the material 3 inches away from the trunk. Mulch insulates roots and locks in moisture.
Balanced Feeding: Apply a light, balanced evergreen fertilizer in early spring as new growth starts. Avoid heavy nitrogen applications in late summer.
Winter Protection: In windy corridors throughout the Heber Valley, applying an anti-desiccant spray in late autumn can reduce winter moisture loss by up to 50%. Setting up simple burlap screens on the windward side protects trees against intense winter winds and road salt spray.
Knowing When Replacement Outweighs Pruning
Not every struggling arborvitae can be saved with pruning shears. It is often smarter to remove and replace a tree under these conditions:
The green layer is less than 1 to 2 inches deep, leaving no healthy tissue to work with.
Severe deer browsing has stripped the bottom 5 feet of the tree down to bare wood, which will never regrow.
Heavy snow split the central trunk, causing widespread structural failure and wood decay.
Root rot or severe fungal needle blight has browned out more than half of the total canopy.
If you are unsure whether your hedge can bounce back, scheduling a professional tree health assessment will give you a clear picture of its structural stability and overall health.
Frequently Asked Questions About Trimming Arborvitae Trees
Can you cut an arborvitae back into old brown wood and expect regrowth?
No. Arborvitae do not have dormant, latent buds on their old interior wood. Any cut made past the green foliage into the bare, brown dead zone will leave a permanent hole that will never grow new needles. Always make sure every cut leaves active green needles on the remaining branch.
How do you fix an arborvitae hedge that is thinning at the bottom?
Lower-canopy thinning is usually caused by sunlight starvation from a wide, heavy top. To fix this, trim back the upper half of the hedge into a 5 to 10 degree inward taper (an A-frame shape). This lets direct sunlight reach the base, encouraging dormant lateral shoots in the lower green zone to thicken up over the next one to two growing seasons.
Is it better to use manual hedge shears or power trimmers on arborvitae?
Manual bypass shears are best for detailed structural shaping because they produce clean cuts without shredding delicate foliage. Power hedge trimmers work well for light tip maintenance on long, formal screens, provided the blades are sharp and you take off no more than the outer 1 to 2 inches of green growth.
Safe, Reliable Tree Care for Your Mountain Property
Keeping arborvitae hedges healthy, dense, and properly shaped requires the right combination of botanical knowledge, sharp tools, and patience. Because evergreens cannot regrow from old wood, every pruning cut needs to be precise. Taking off too much green growth or cutting into the inner dead zone can permanently ruin the privacy screen you have spent years growing.
Our team at Rocky Mountain Treecraft understands the unique challenges of caring for trees across Heber City and Wasatch County, from heavy winter snows to dry summer mountain winds. Whether you need selective shaping for mature hedges, structural hazard pruning, or help assessing struggling evergreens, we are here to help your landscape thrive. Contact us today to schedule an on-site visit or request a free estimate for our professional tree trimming services.